Ingredients:
- Google presentations
- PC and projector
- (laptops)
- (Google search)
Many
teachers frequently use MS Word in combination with a projector instead of using the chalkboard.
The problem is always accessing the file from home or sharing it with the
students. The file usually ends up on the school’s server never to be used
again.
Using
google documents solves this problem as you can always access the content
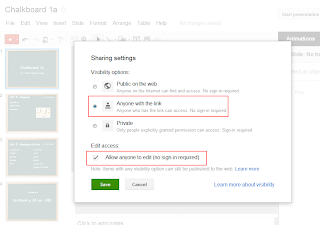
online and share it with your students with three mouse-clicks.
However, after
a couple of lessons this too gets quite messy, because you need either a very
long document or end up having lots of documents.
Google
presentations helps solve this problem. If you distribute the content over
slides it is much easier to access it again. This simply simulates multiple
chalkboards. I even make the slides look like a chalkboard. Here is how to do
it:
- Search for an image that looks like a chalkboard you like
- In Google presentations right click on a slide and upload the image as background
- Change the font settings to white and comic sans font (to simulate chalk handwriting)
- Choose the layout you would like (title, two columns, blank, etc.)
- Duplicate the slide to “clear the board” and start a new one
Now you can
access your chalkboard from anywhere, grant the students access or even the
rights to edit them. The latter option can come in very handy if you want the
students to write on your “board” just like in the classroom. For doing so,
they would have to have their own laptops or PCs.
Even if
students don`t have the possibility to edit the slides during class it is
possible for them to work on them from home. A reasonable homework assignment
might be for each student to create their own slide on a given topic (e.g.
presenting one sight in London, their favorite animal, etc.) within the same
presentation.
Benefits of
using Google presentations:
- Available anywhere
- Shareable
- Downloadable to a mobile device in a variety of formats for reviewing and studying


.png)


