Seiten

Posts mit dem Label Google Maps werden angezeigt. Alle Posts anzeigen

18.01.15

Viewing any Streetview image in virtual reality/Google Cardboard


Google Cardboard is a very cheap ($20) way of enjoying virtual reality applications. Even though applications for education are still in their infancy, there are a couple of interesting apps for schools, like the guide of Versailles palace or Streetviews included in the Cardboard demo app.

aurora Screenshot_2015-01-18-10-13-01.png

If you have already tried out Google Cardboard app you might have wondered how you can view any Streetview image, and not just the ones shown in the demo app.


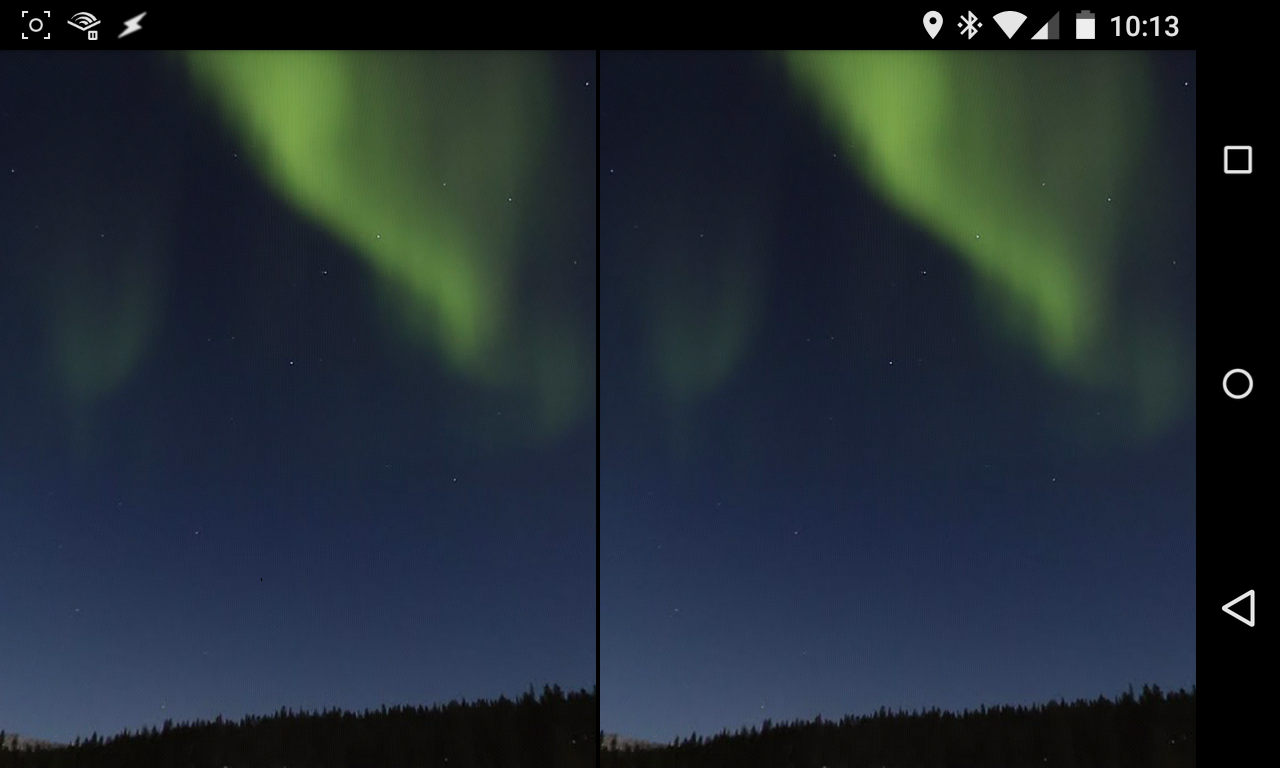
Here is the trick: you need the latest version of the Google Maps app. In the lower right corner there is an icon that lets you view the streetview in a look around mode. If you double tap that icon you get a spilt VR image. That’s all. Now you can enjoy the streetview in your Google Cardboard.


24.06.14

Going (almost) paperless with free Google tools

I’ve been organizing a one week school trip to England with about 30 students and I am astonished  by the vast amount of not only paperwork but actual paper such a trip still requires in 2014, when all my students are equipped with computers and smartphones. Starting from catalogues of tour operators to endless lists for payments, passport numbers and host families the paper flow just doesn’t seem to stop. One thing that has particularly puzzled me is that I had to ask for a digital copy of anything I received from the tour operator, including boarding passes and addresses of our host families. In order to reduce the amount of paper I have tried to use electronic tools between me and my students when collecting data and sharing information as much as possible. These include:


Student information
I collected almost all of the information (phone numbers, email addresses, parent’s phone numbers, etc.) I needed via Google Forms (see here) and then exported the contact details to my Gmail contacts to have my students’ and their parents’ phone numbers available in case of an emergency.


Travel documents and information
I have shared some important travel documents and information via Gmail and Google Drive. In particular students should have their boarding passes and the addresses of their host families available on their phones. Other, less essential, information includes: travel guides, tube map, bus timetables in PDF format (these are also available as apps).


Programme
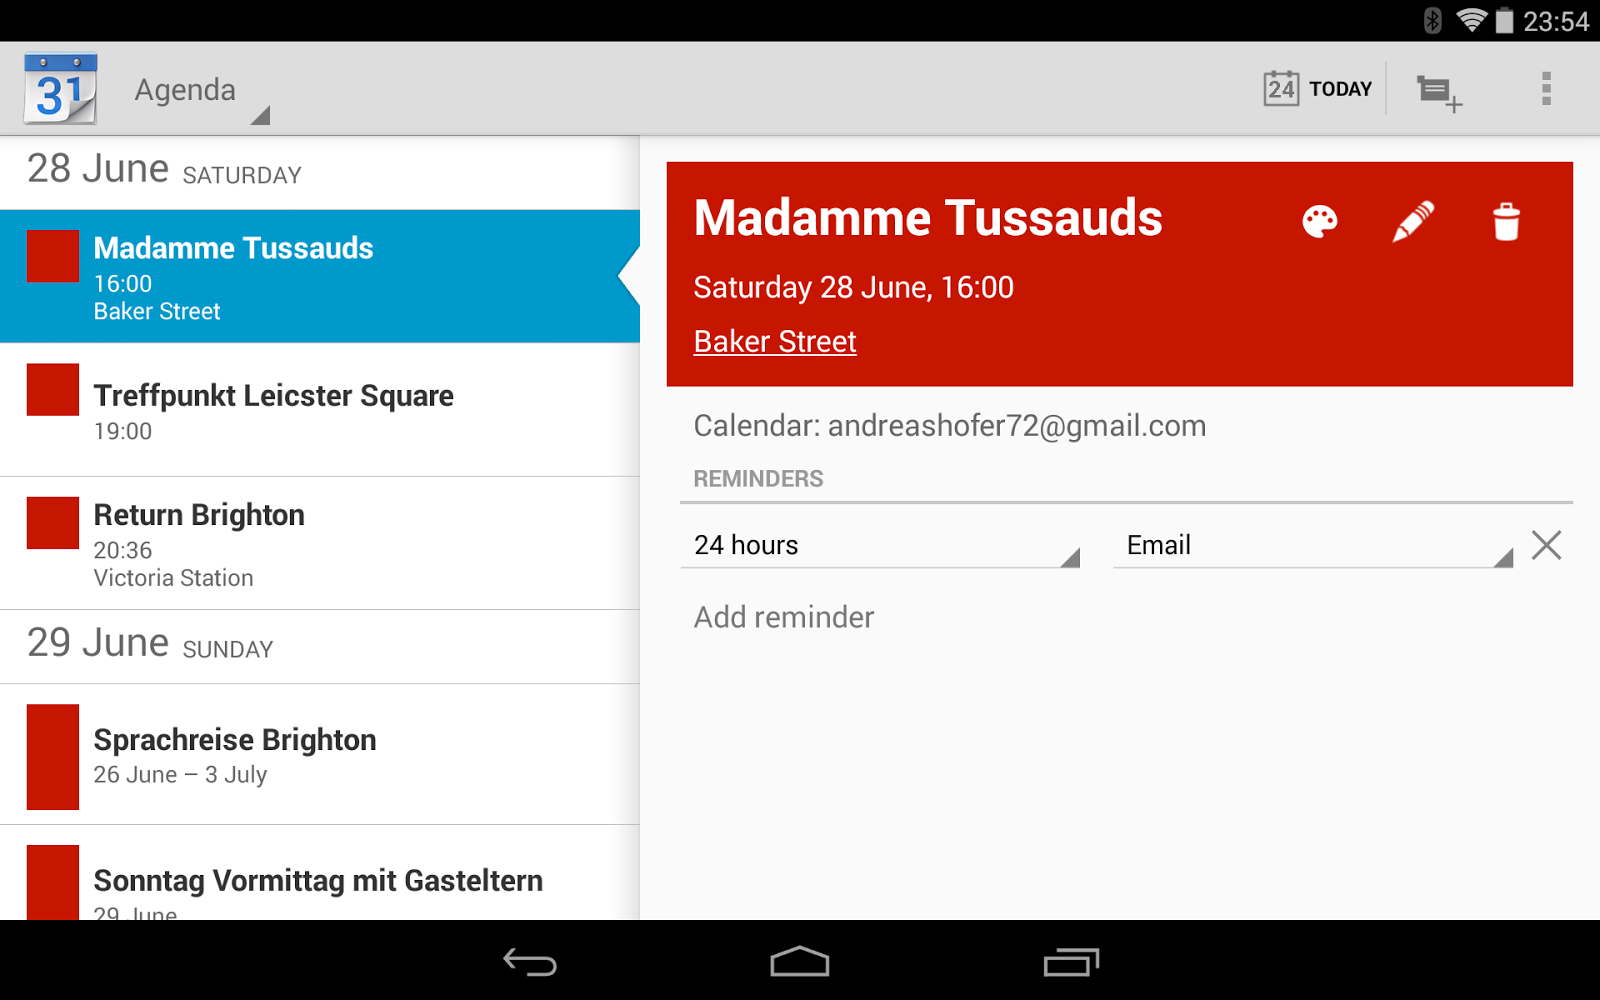
I created the programme in a Google Doc initially when it occurred to me that the best way of doing the programme is using a sheet. This allows you to quickly create a (shareable) Google Calendar, which is much more flexible than a conventional table: different views (most useful ones being the agenda view and the weekly calendar), it automatically creates links to Google Maps if you specify a place, students can import the calendar in their calendars and you can update events in real time.

i.png

Maps
Of course maps are always useful when travelling. For this particular trip I have created a map in Maps Engine for our day trip to London custom placemarks as well as a map of the host families homes. The latter can be easily created from a Google Sheet.


Checklists, vouchers, etc.
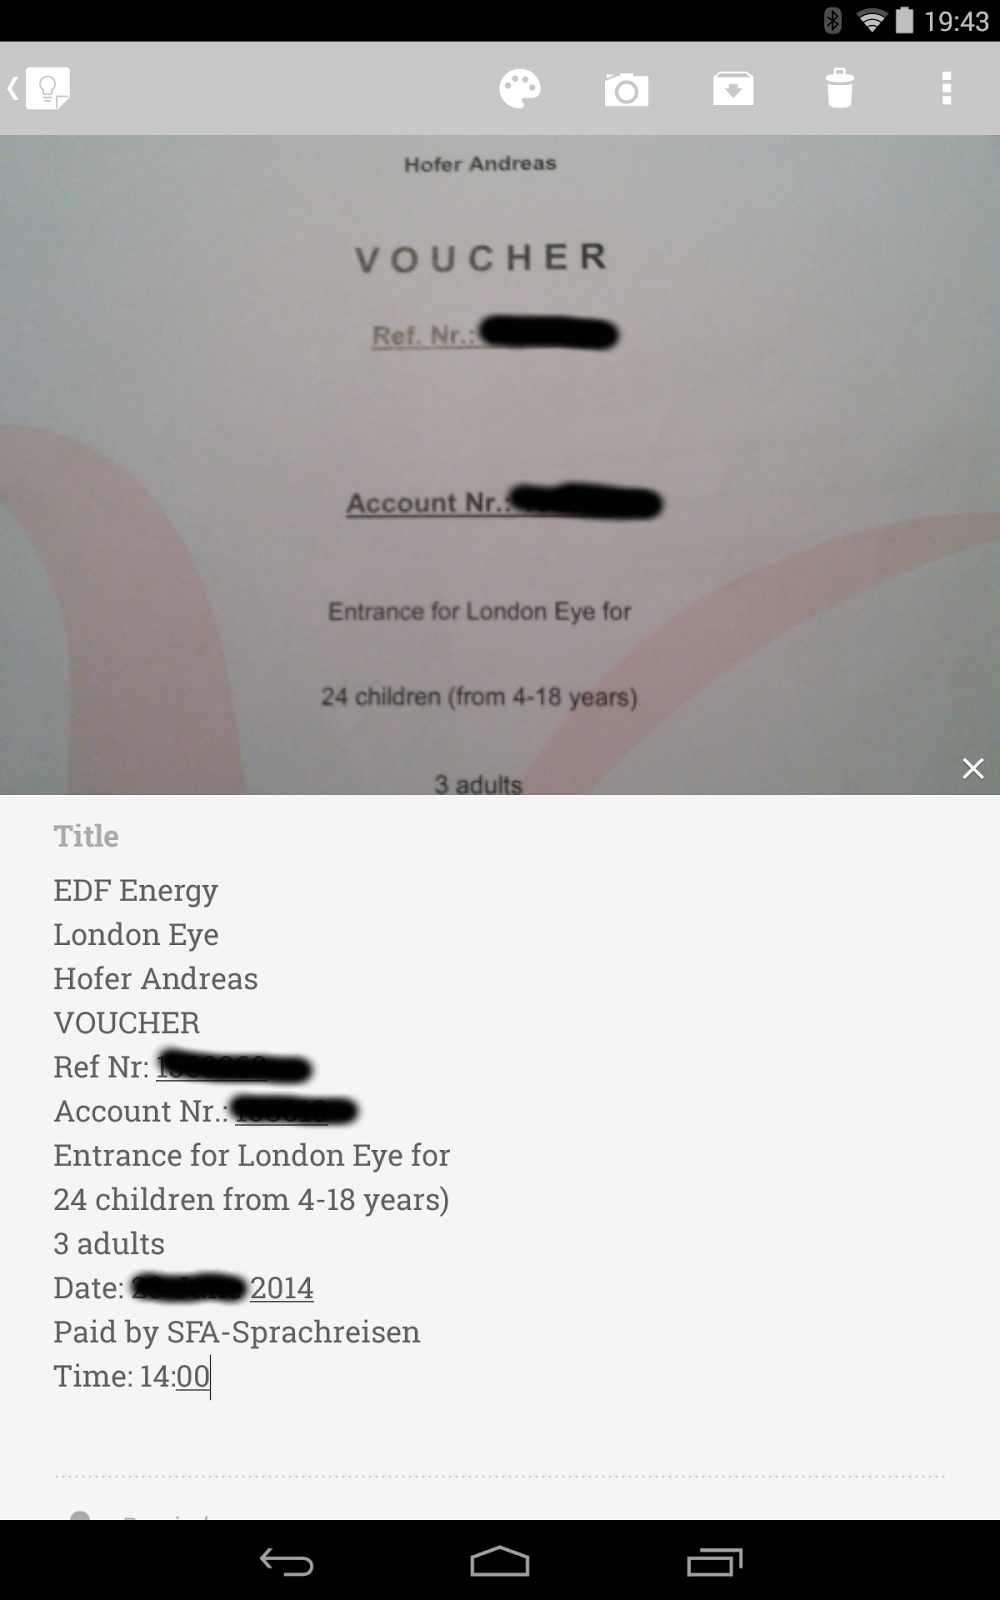
For some kinds of information Google Keep is more convenient than Google Drive. Google Keep is way faster than Drive and you don’t have to enable offline availability first as in Drive.  I created a quick copy of a number of documents with my phone and then sent the image to Keep and had the text transcribed (as in the example of the voucher below). Checklists are another thing that are easier to do in Keep than in Drive. I keep a checklist of all participants in a note, which I can copy spontaneously for whatever purpose might come up.

voucher.png

20.06.14

Creating customized maps for school trips

When it comes to maps Google services are even more confusing than when you are undecided where to upload photos to (Drive, Picasa or Google+). There is  a wild variety of options:

  1. classic My Maps for creating a Google Map
  2. more recent Maps Engine (lite) to create maps on separate layers
  3. geocoding locations in Fusion Tables
  4. geocoding locations in Google Sheets using an add-on
  5. recording a trip, route or tour with MyTracks  Android App and saving to Drive
  6. placing photos on a map using Picasa (not available in G+ Photos yet)
  7. creating a tour on Google Earth


In the past I used options 1 and 5 most frequently for creating maps for school trips and for presenting them with photos on a map on Open Days, etc. Google has made it clear, however, that it is favouring Maps Engine over other services (e.g. by changing the export option in MyTracks to MapsEngine from MyMaps and Fusion Tables) when it comes to custom maps. For this reason I have decided to give it a try in a real life situation. For my upcoming trip to England I needed to create two maps (and share them with my students).


A) Creating a map  of all host families where the students are accommodated using Google Sheets
2014-06-20_09-10-37.png
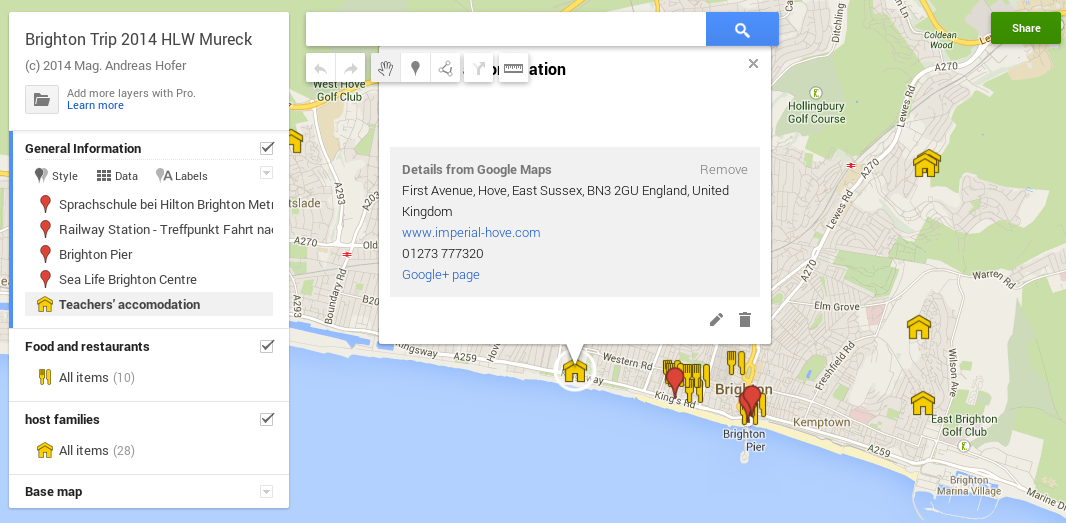
We will be staying in Brighton for a week and I have created a map of Brighton containing three layers (maximum for the lite version): general information, restaurants and host families.
The information for the “host families” layer comes simply  from a Google sheet which I received from the tour operator and which I imported right after creating the layer. When importing you need to tell Maps Engine which column to geocode. The final step is to change the placemark icon. I have used houses for accommodation and knife and fork for restaurants.


B) Creating a map for a day trip to London including walking route and meeting points
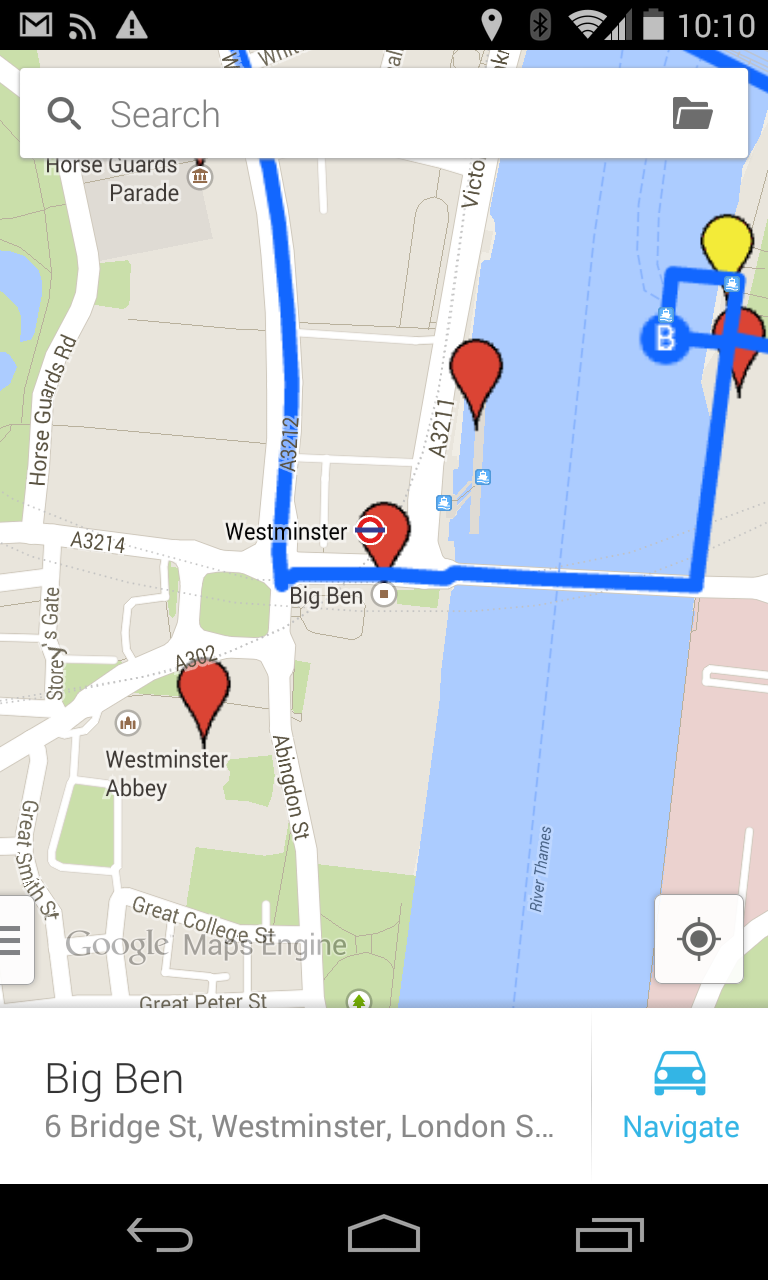
We will go on a day trip to London as well. So I have created a map which shows the route we will be taking using the walking route tool (first click on the draw line tool and then choose the walking route). It works very intuitively: just drag and click to add places.
Then I added some general places of interest which the students will be able to visit on their own during free time on a separate “sights” layer. And finally I colored in the meeting points.


Screenshot_2014-06-20-10-10-10.png

Creating these maps was fun and easy, despite my initial reluctance to use Maps Engine. I would have preferred Google MyMaps instead. Apart from having the disadvantage that you have two different apps both on the web and on mobile, the biggest drawback of Maps Engine is that you can’t save a map on a mobile device like in Google Map, which of course would be highly useful on a trip abroad.


Having said that, there are also a number of nice features to Maps Engine:
  • It works like other Drive apps including sharing, publishing and embedding
  • Layers are definitely a bonus as they make the map more legible
  • Importing data from a Google sheet and automatic geocoding is a huge time saver
  • The mobile app allows you to use the phones sat nav system
  • You can export in kml format (e.g. to Drive just to keep a backup, or to Google Earth for a presentation)

10.05.14

How to create a tour with photospheres and embed it into a website or blog

Photospheres are 360 degree photos which can be taken very easily with smartphones using the Android 4.2 OS or above. It is possible to connect them and create a Google Streetview like tour. This can be used for projects in schools, e.g. to create a tour of the school, a nature trail or simply as a souvenir from a school trip. 


2014-05-10_22-32-30.png


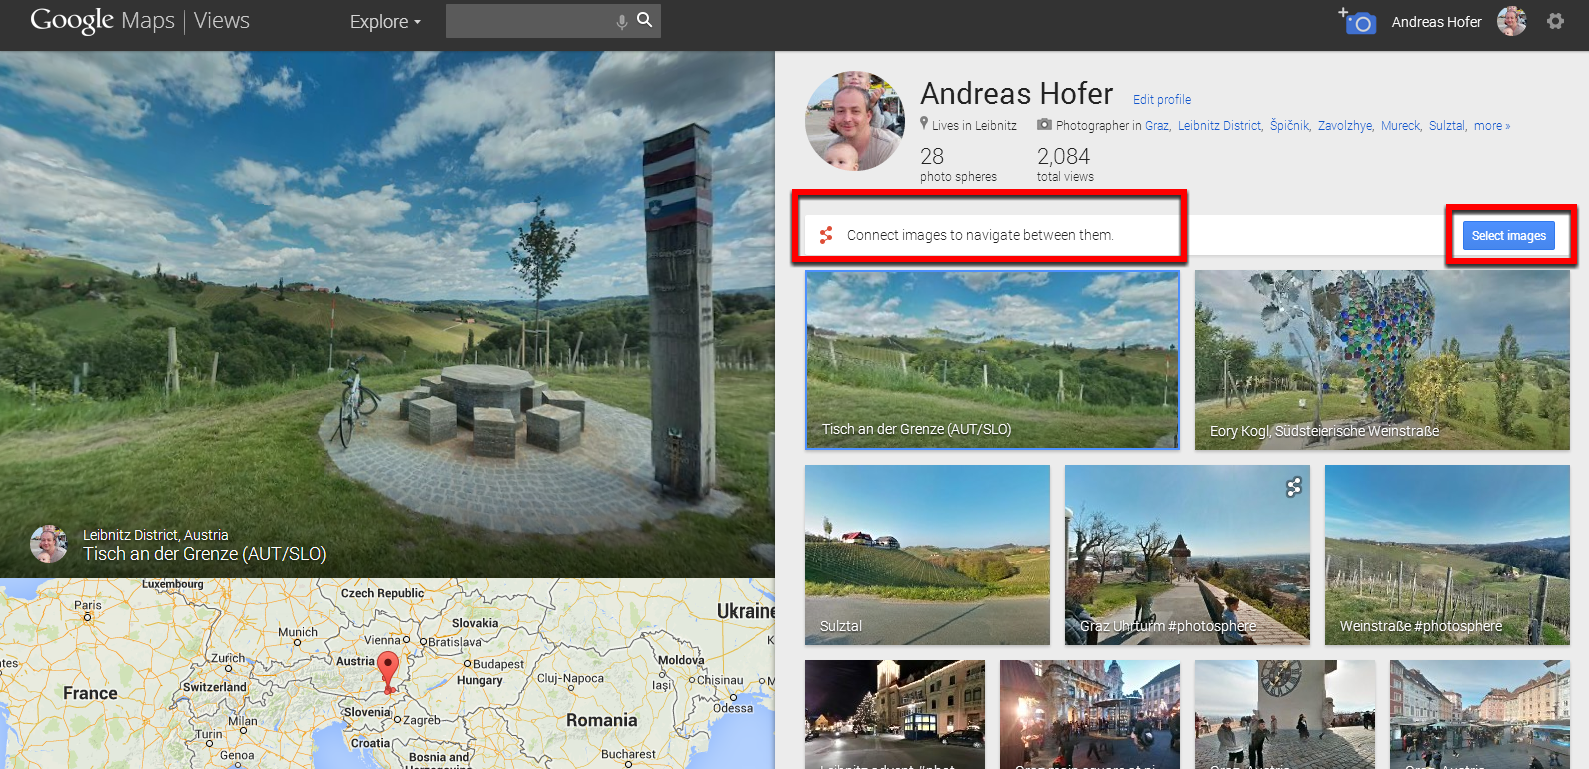
Photospheres are wonderful, but they have a catch: they can be only viewed on Google+ or Google Maps and they don’t come with an embed code for websites or blogs. However, there is a workaround. Here are the necessary steps:

  1. Upload the photospheres to Google Plus (in case of a collaborative projects I always use a Google account that I have created especially for school projects and none of the students or mine)
  2. Upload the photosphere to Google Maps Views using this URL: https://www.google.com/maps/views and chose the photospheres from your Google+ photos
  3. You can connect different photospheres to create a tour in Views simply by selecting the photospheres there.
  4. When you watch your photoshere or tour in full view you get a sharing icon which lets you share the link and gives you the embed code for your website or blog.


View Larger Map

30.03.14

Tips for easier (anonymous) collaboration in Google Drive


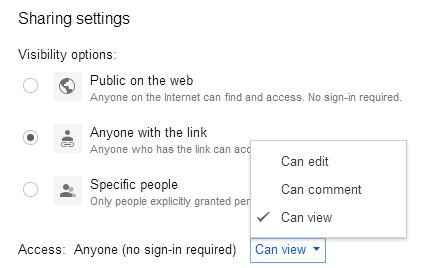
For many teachers using Google Drive in class is made more difficult by the fact that not all students use or want to use Google Drive. Most of my students have a Google account, but very few really use Google Drive and some are reluctant to use their accounts because of privacy concerns. Luckily anonymous sharing and collaboration is almost as good in most situations. I simply share a document using the option “anyone with the link” and then choose “can view/edit/comment” according to my requirements. 2014-03-30_09-29-03.png


One problem that might arise due to anonymous collaboration is, that the document gets a bit messy. The solution: simply use class lists to organize anonymous documents.

Sheets: I keep lists and gradebooks of my classes on Google <Sheets. Whenever I need a collaborative sheet (e.g. signing up for presentations) I simply create a new sheet, paste the names and share the document with the students.

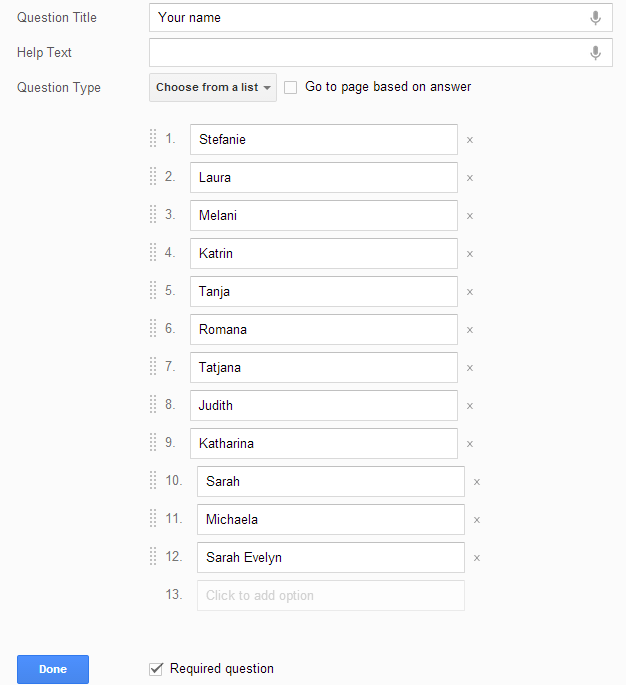
Forms: Forms are always anonymous, but you can create a name field and make it a required question. To make things easier for the students select “choose from list” and paste your students names from your Sheets list. Forms is very user friendly here. 
2014-03-30_09-23-47.png

Slides: There is not really a quick way of doing the same thing for Slides. The teacher can pre-populate the presentation with slides bearing the students’ names and then save the presentation as template. Alternatively the students simply do that themselves (i.e. create slides with their names, possibly in alphabetical order). Collaborative slides are a huge time-saver in class as merely changing USB flash drives (let alone starting up Powerpoint) takes a lot of time. So, whenever I have only short presentation (typically up to a minute) I ask the students to create one or several slides in a single collaborative document.

Docs: The trick in Docs is a little bit less obvious. Again paste the list of names from Google Sheets or Excel. This time, however use the key shortcut ctrl-shift-v so that you only get the text and not a table. Then format the names using one of the heading styles (e.g. heading 2) and create a table of content. All the students need to do now is click on their names and start writing.

You can use this method whenever:
  • you work with younger students who have no accounts
  • you only have a short text  and you don’t want to open up 15+ documents
  • you want the students to work on one document only
  • you want the students to see the work done by their classmates (e.g. it might be interesting to compare different endings to a story.
  • you want to publish the document to your blog/website and save yourself the time to copy from 15+ documents.

Using the students’ names in alphabetical order also makes it easy to spot the students who haven’t “handed in” their work yet.

Here is an example:


31.05.13

Meet the new Google Maps

The new UI of Google maps has a lot of the look and feel of the Google Earth mobile app. It might take a few minutes to get used to it, but generally it is very intuitive, fun to use and has a number of new features, such as  new 3D-buildings (select cities only so far), photo slideshows and a very slick search/information panel. 


In case users prefer (temporarily) the old Maps, the settings allow you to change back to the classical view. Google MyMaps can also be found in the settings menu. MyMaps has not switched to the new view (yet). 

05.07.12

In London with a smartphone (animated video)

Having used Google Maps so much in school trips to England recently, I decided to make a short animated video about it. It also includes very recent changes such as Inside Maps, that show you the interior plans of museums, airports, big department stores (Harrods in this case). Enjoy!


25.06.12

Google Maps animated video mashups


In this post I show how easy it is to create animated maps and places with the help of two great web apps: Google maps and screencast-o-matic.com. Such animations can be used in video projects or PowerPoint presentations, e.g. of field trips or virtual trips as well as in slideshows or any other kind of digital storytelling.  

All that has to be done is animate a map (zoom, pan, tilt) by using the sliders or manually moving the map or merely typing in the location and let Google maps zoom in on the destination. Before doing the animation you need to set up screencast-o-matic (see image). Make sure the viewport shows no controls or text and test the animation before recording. Once the recording is finished you can save the video as mp4 file and use it in a video editing program such as Live Movie Maker or in a presentations program such as PowerPoint.


As Google maps is extremely versatile you can create a number of different animations using Maps, Earth (including 3D models) and Streetview. Here are 11 ideas how to use Google Maps animations for video mashups:

  1. Zoom in from outer space to show location
  2. Fly over runway to signal the beginning of a trip
  3. Animate globe to indicate flight
  4. Pan or zoom in Streetview to show landscape or building
  5. Create a panoramic view in Google Earth
  6. Create a flyover using 3D-models (zoom in close enough) to show a tour
  7. Switch from Map view to model view to show a building
  8. Zoom out from one location and zoom into another one to show a route
  9. Pan or zoom a model to show a building
  10. Fly over a landscape to show elevations (hills, cliffs, mountains)
  11. Last but not least the classic line (draw in mymaps) that shows a route


Here is the full class project in which these animations where used:


13.06.12

Google maps mobile on school trips abroad


Google maps has made some news recently, mostly because Apple has decided to replace it with Tom-Tom maps in iOS6. Now the major mobile OS come with their own maps applications (Windows phone with Nokia maps). Even though the Google app now seems far less impressive in comparison to the new iPhone app it still remains the most versatile mobile app as Google has been adding really useful features over the past year, including:
  • 3D maps (zoom in and pull down with two fingers)
  • Streetview
  • Cached maps (download via wi-fi - use offline, particularly useful abroad)
  • Indoor maps (airports, shopping malls, etc.)

I recently went to London on a school trip with a class of mine and had the chance to thoroughly test this app. Even though I had been using already quite a lot before it turned out to be even more versatile than I had imagined as I had many uses for it:
  • Maps and directions (works even offline with pre-cached maps)
  • Turn-by-turn sat navigation
  • City guide (search for nearby restaurants, attractions, etc.)
  • Phone book (add contacts to address book or call directly from the app)
  • Train/bus/underground schedule and travel planner (directions for public transport)
  • Notebook (starring or checking in at favorite places)
  • Sharing places (e.g. a shop) via email, social networks, etc.

Google maps is not only an invaluable navigation tool when you are responsible for 40 something students, but also helps you organize your trip. Just to give an example: you want to take your class to a bowling center. Search for bowling inside the app and you get lots of places in the vicinity including reviews to make a decision and a phone number which you can tap on to make a reservation. Tapping on directions and choosing public transport gives you all the options of how to get there by train, bus, etc. as well as departure and arrival times. Finally, a look at Streetview helps you to quickly identify the right building once you get there. 

Last but not least, the "Mymaps" feature of Google maps allows you to create custom maps, even collaboratively with a class. This feature could be used e.g. to create a map of all the places you would like to go to on the trip, or create a map with photos of the places you went to on the trip.

22.02.12

QR-Codes in the classroom (weblinks)


Tips on using QR-Codes with weblinks in the classroom. Includes, short reading texts, feedback, listening comprehension and maps.

14.12.11

Creating a (mobile) info-map for a field trip


Ingredients: Google maps + Google maps mobile app

On a field trip it would be convenient to have all useful local information, such as sights, accommodation, places to eat out, etc. in one place. Google maps in combination with its mobile app provide an easy way of creating a map with all the required information and retrieving it easily when needed.

Image going on an English language trip with a class to England and you want to provide the students with the following information:
  • Teacher’s accommodation (+phone number)
  • Accommodation of students (staying with host families)
  • The school’s address
  • The location of the major sights
  • Inexpensive places to eat out

09.12.11

Using Google Maps app on language/field trips


 There are scores of useful apps for language/field trips, ranging from tourist guides to public transport information and offline maps.  There is one free app that combines all that functionality and much more and it’s the familiar and (on most smartphones) pre-installed Google Maps app. This year the app got some great new features, so it’s definitely worth updating if you haven’t done so. Particularly as the most recent versions of it let you download (pre-cache) 10 map areas, which is very handy when you don’t have wi-fi or 3G access (the latter being too expensive abroad).

Imagine the students have some free time and look for an interesting place to go. They go to Maps (either at their host families’ place or at a public Wi-Fi hotspot like McDonald’s) and search for attractions with the places tab). They find the “Natural History Museum”

11.09.11

Creating, revising, testing content: learning by Google apps round tripping


Ingredients:
  • Mobile phones
  • Vocabulary for GDocs app
  • Google Goggles
  • Picasa
  • Picasa mobile app
  • Google Forms
  • Google Spreadsheets
  • Blogger
  • Google Maps (optional)
  • Google Sites (optional)
Most e-teachers associate one educational with one educational activity. However, most of Web 2.0 is “mashable” and particularly Google apps have a high potential to be re-used in Moodle, on blogs mobile apps and so on. In this post I would like to suggest an idea for a class project that includes creating, revising and testing content, which you consider a “learning cycle” from a constructivist point of view.

07.09.11

How to create your own Google Maps data mashup

Ingredients:

Google Maps are among the most popular services for mashups. It is possible to put almost anything on a map: photos, diagrams, text, data, even video and audio files. There are many ready-made mashups, like city guides and and tracking a emperor penguin named “Happy Feet”. For some more creative examples check out: http://googlemapsmania.blogspot.com/

I have already posted about how to put photos on Google Maps and in this post I would like to show how easy it is to put data on a map using Google Fusion Tables. Fusion Tables is a lesser known Google Service and it is not quite as intuitive as other Google Docs. Still it is easier to create a mashup with Fusion Tables than using Yahoo Pipes or using the programming API.

As an example I will use technical colleges in Austria.

26.08.11

How to create a mobile city guide as class project

Ingredients
  • Google Sites
  • Picasa
  • Google Maps
One great class project could be to create a mobile tourist guide of their city or town (geography or foreign language class, or in combination). Google sites now lets you create mobile friendly websites. All you need to do is use a mobile friendly template when creating a new site. The students are grouped into teams.

The single teams then make web pages of the sights and other places of their town.  They post their own photographs to a Picasa album. Google Sites has an option to insert photos directly from Picasa. Of course, the mobile guide also needs a map of the places. The photos can be put on a Google map (see Creating a field trip photo & map mashup) and the map can be inserted directly from Sites without using the embed code.

25.08.11

Creating a field trip photo & map mashup

Ingredients:
  • Picasa
  • Google maps
When I go on field trips with my students I usually take a lot of photos which I upload to Picasa and share via Moodle. One great way of viewing the photos is by seeing them on a map where they were actually taken. In order to do that you need to create your own Google maps mashup. That does not require any programming skills or in-depth knowledge of the Google maps API and can be done in a few simple steps.

Beliebte Posts