Seiten

Posts mit dem Label Google Sheets werden angezeigt. Alle Posts anzeigen

16.06.14

Adding photos to a Google Sheets gradebook and creating a seating chart

One of the more frustrating aspects of Google Sheets is importing images. If you import an image with “insert image” menu, it will just “float around” rather than being attached to a certain cell. The ideal way of importing images to a gradebook would be to import a Google Drive folder containing the images (in alphabetical or numerical order) and then having them automatically assigned to the students’ names. Unfortunately that option isn’t available in Sheets, nor have I found a script which would do just that on the web.

16-06-2014 23-08-42.png


There is an =image(URL) function which can load images from an URL. Unfortunately you can’t load images from your drive, because the URL is not directly accessible (unless you make the folder containing the images public).

The fastest workflow I have come up with is the following:
  1. upload the photos to a Google+ album
  2. import the images from the album (thumbnail URLs) with =image(URL)
  3. use the index & match functions to move your images to where you need them (seating chart, student report, etc.)

You can speed up the import process if you get the URL from the neighbouring cell rather than pasting it into the formula each time (see here). Copying and pasting from a Google+ album doesn’t take long (about 2 minutes for 20 students if you have their photos already uploaded).

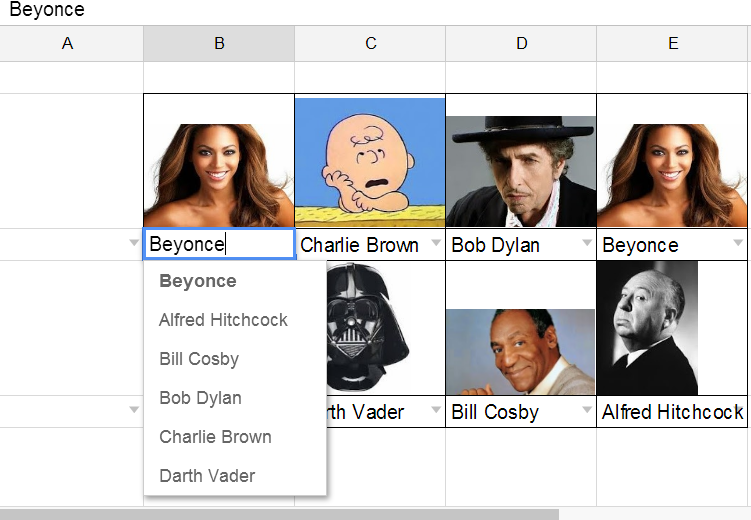
Depending on where you want to move the photos you can use a variation of the index/match formula. For creating a seating chart I create one row with a pixel height of about 100 and use the row below for the caption (using data validation is very handy here). Finally I simply have the row above find the corresponding image fromt the “import photos” sheet” using:
=iferror(INDEX( 'photo import'!$C:$C,MATCH(B3,'photo import'!$B:$B,0)))
You can then conveniently create a seating chart using the dropdown list of the students’ names instead of having to move around the images.

To see this in action just make a copy of the tutorial file.

Unfortunately the Android version of sheets doesn’t display photos (yet). So, if you want to have a copy of the seating chart on a mobile device you will have to download the sheet as a pdf file.

11.06.14

Organizing presentations, reports and other tasks with Google Sheets and Google Calendar

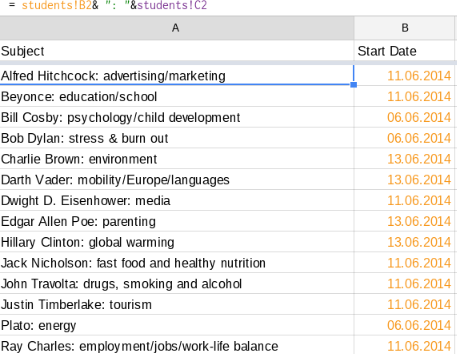
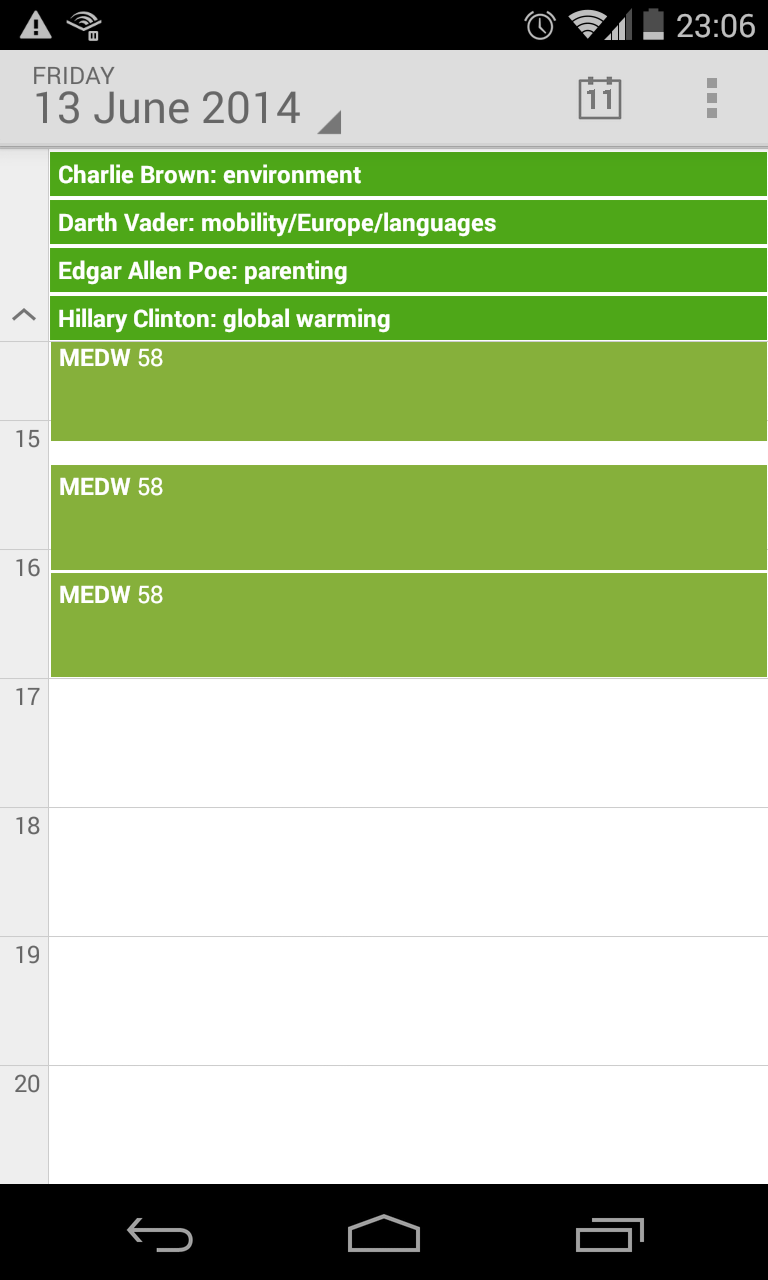
When I have student presentations in class I usually create a Google sheet in which students sign up for topics and a date. I like to have the date both in a spreadsheet (so that I can copy or import (using the importrange() function) the data into my gradebook and in my Google calendar so that I know who are the presenters for a given class without having to check a separate sheet. This can be done by using a CSV file for export/import.

2014-06-11_22-21-03.png

Of course it would also be possible to share a Google calendar with the students, however using a sheet has a couple of advantages. Cases where you might want to use sheets instead of Calendar are:

  • you already have a list of dates which you don’t want to enter manually into a calendar
  • you have a large set of data, which are easier to enter in a spreadsheet
  • anonymous collaboration (when not all of your students have a Google account)
  • when data validation comes in handy (e.g. only certain dates possible)
  • you already have a list of dates which you don’t want to enter manually into a calendar
  • when you have recurring tasks or events (e.g. students taking turns to do tasks like keeping the classroom clean)
Screenshot_2014-06-11-23-06-41.png

So, here is what I do to collect the dates:

  1. Create and share a sheet with the list of topics for my students to sign up for
  2. Use data validation to create a dropdown list with my students’ names
  3. Use data validation to limit the possible dates and avoid mistakes
  4. Create a sheet which matches the data to my class list
  5. Copy the data to an export sheet for Google Calendar

Sounds complicated? Most of these steps are actually optional and only meant to make the signup process more user-friendly to my students. All you need is one sheet with specific headings for Google  Calendar. In it’s most basic form these are “Subject” and “Start Date”. Of course you can also use “End Date”, “Location” and some others in case you need them.

As far as the calendar display is concerned, you can pack everything you want to show up in your calendar into the “Subject” column. You can do this by concatenating the relevant information, e.g. = student &”: “&”presentation topic. In my sample sheet I copy the information from a separate sheet: = students!B2& ": "&students!C2


To import the dates into your calendar (or class calendar which you share with your students) you have to save the sheet as a CSV file and import into Google Calendar (go to “other calendars, drop down menu > import calendar, then choose the CSV file and specify which calendar you would like to import the data to in case you have more than one calendar).


Note: This workflow is not very convenient if you keep updating the sheet. In that case a script automating the export/import process would be ideal. Unfortunately I cannot recommend any such script as all the scripts I have found so far didn’t work properly or had some kind of a flaw. I would be greatful if someone could point out a great script in the comments.

Beliebte Posts