Seiten

18.08.15

Creating quick tests with Google Form grid questions

One of the most popular methods for creating online quizzes and tests for teacher is using Google Forms with the Flubaroo add-on. I use the same combination for tests which I already have in paper or pdf form. As typing out all questions would be a bit cumbersome and redundant, I actually just use paper/pdf with a Google Forms “answer sheet”, which then will look something like this:
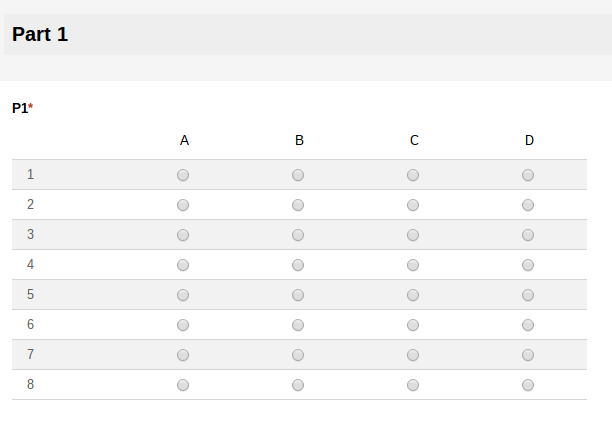

Screenshot 2015-08-18 at 16.21.04.png

This works particularly well with standardized tests (like the Cambridge English certificates) which use mostly multiple choice, true/false questions. This is a huge time saver, as you don’t have to type the questions themselves and you can quickly create a lot of questions instantly. I do that by copying the number of questions and possible answers from a Google sheet. Say you need 12 questions with four options all you need to do is copy and paste them from the Google sheet.
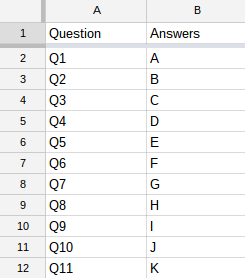
Screenshot 2015-08-18 at 16.21.54.png

The students then are sent two links: one to the pdf file containing the test (which can also be printed out) and one to the Google Form to enter their answers. As this kind test is mobile friendly, the students could also use their smartphones to to that.

Using the Flubaroo add-on (there are plenty of tutorial for that) the answers are automatically graded based on a model answer by the teacher. The score and the correct answers can also be sent back to the students. This way an existing test can be quickly turned into an both student and teachers can get immediate feedback.
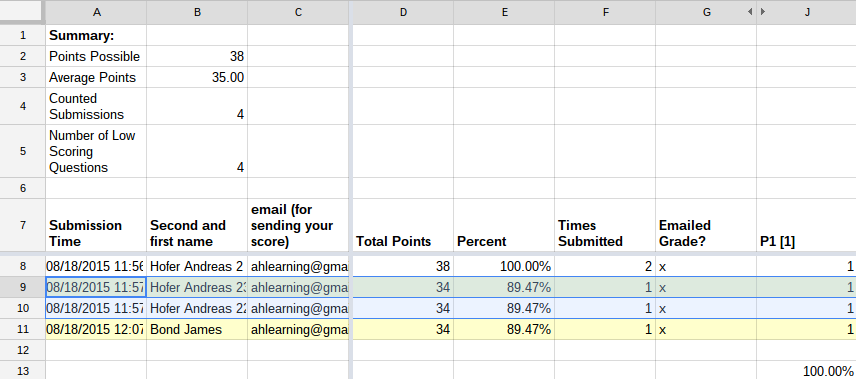
Screenshot 2015-08-18 at 16.49.09.png

21.06.15

Google Slides mobile with Chromecast support

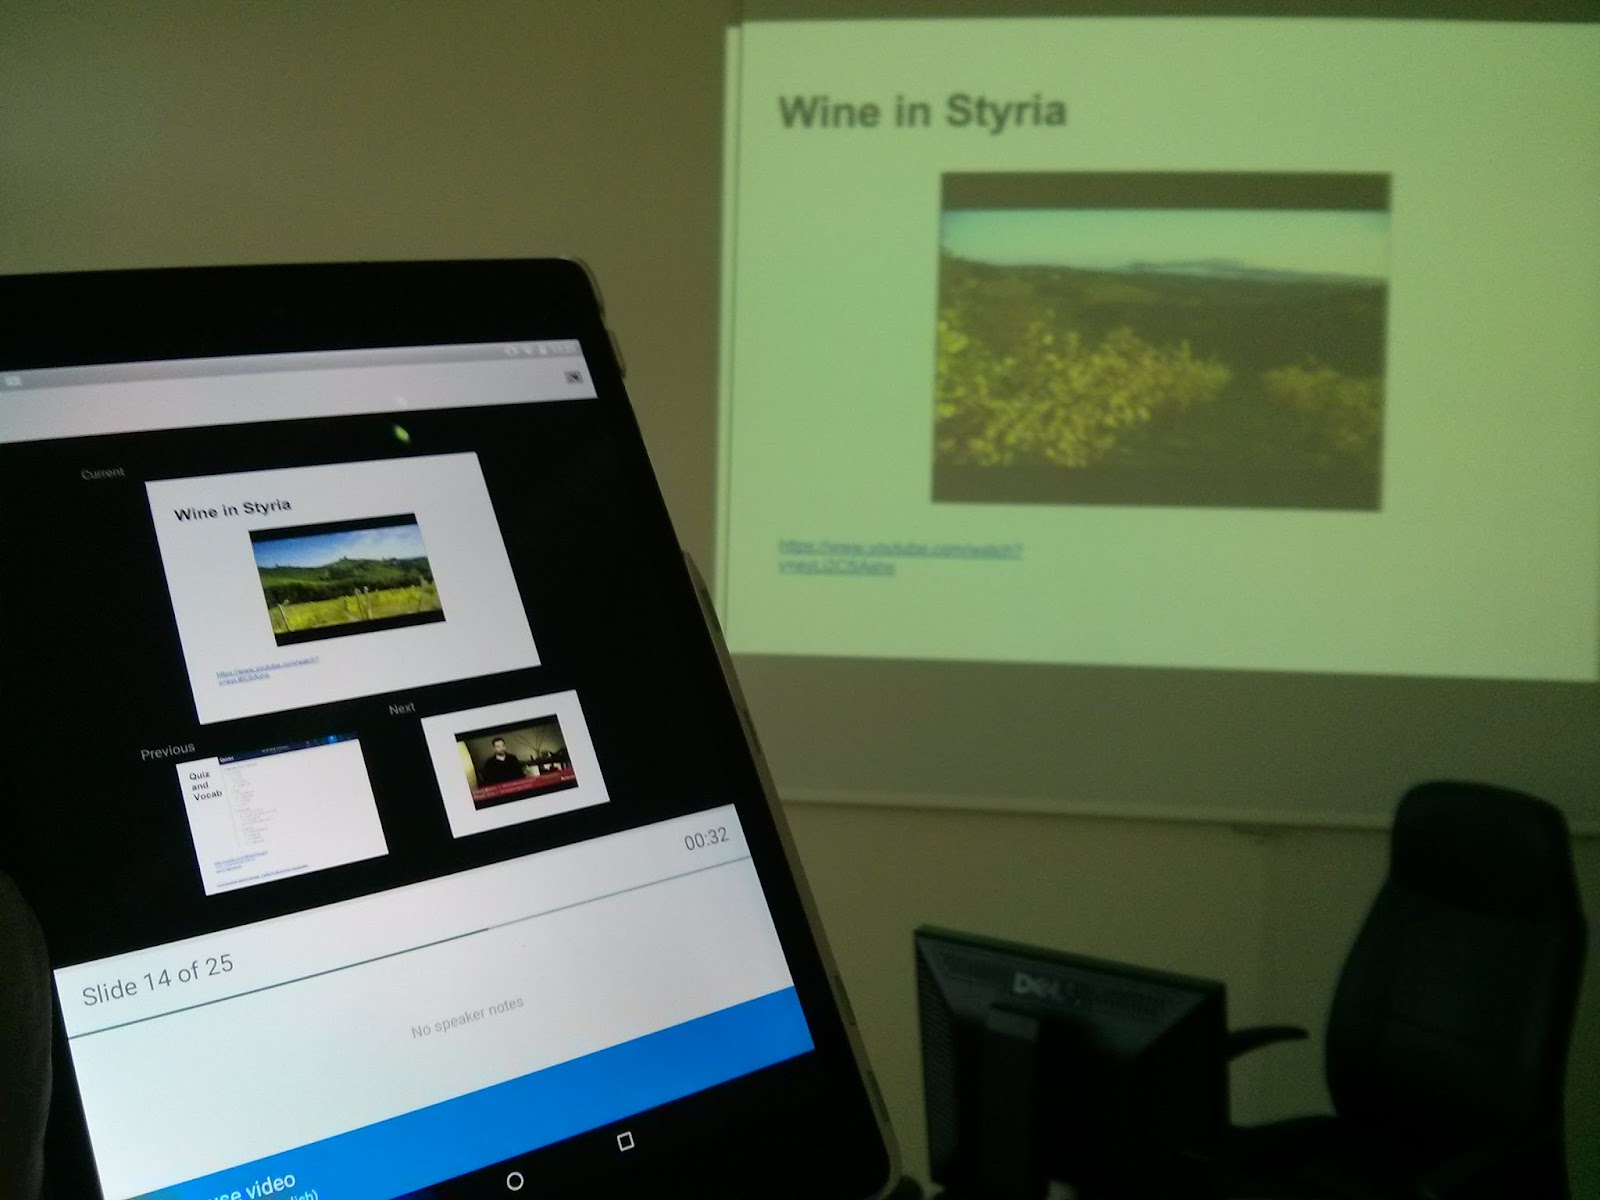
Google Slides has been my favourite presentation software in the classroom for years now, the main reasons being its ease of use, speed and Google Drive integration (e.g. inserting images, linking to other files). One thing I have missed though was the integration with Google’s own Chromecast, which now has finally arrived (together with AirPlay support) in its mobile apps.


IMG_20150619_133321.jpg


So far you could do Slides presentations on Chromecast only via mirroring, which has a number of drawbacks:
  • only Android 4.4 and higher devices support mirroring
  • battery drain due to constant connection and screen on
  • no speaker notes as those would be seen on the big screen


All these drawbacks disappear in the Chromecast integrated version of Slides: you can view your speaker notes and even turn off your device’s screen during presentations. And even iOS devices are supported.
As you can expect with Google first versions Chromecast support is not perfect, but it is actually pretty good for a start. Here are the pros and cons:


Pros:
You can remote control your presentation with the following features:
  • shows previous and next slides
  • shows speaker notes
  • shows presentation timer
  • allows video playback and pause


Here is what I still miss
  • slides slider for skipping several slides at a time
  • a video slider for fine grained video control and full screen mode
  • a blackout button to temporarily turn off presentation
  • a pointer


Some of these are only minor inconveniences, however, as there are easy workarounds for them. Skipping several slide: go back to main presentation screen and choose the slide you want to continue with (you also have to reconnect the Chromecast). Video: for full screen viewing all you need to do is enlarge the video to full slide size in design mode. If you need to work a lot inside a video (frequent replay, skipping, etc.), it would be best to Chromcast from the YouTube app and if you absolutely need a pointer you can use Chromecast mirroring.

All in all, the first version of Slides with Chromecast support is highly usable and I’m looking forward to seeing more useful features in future.

28.04.15

Using Google Cast for Audio in the classroom

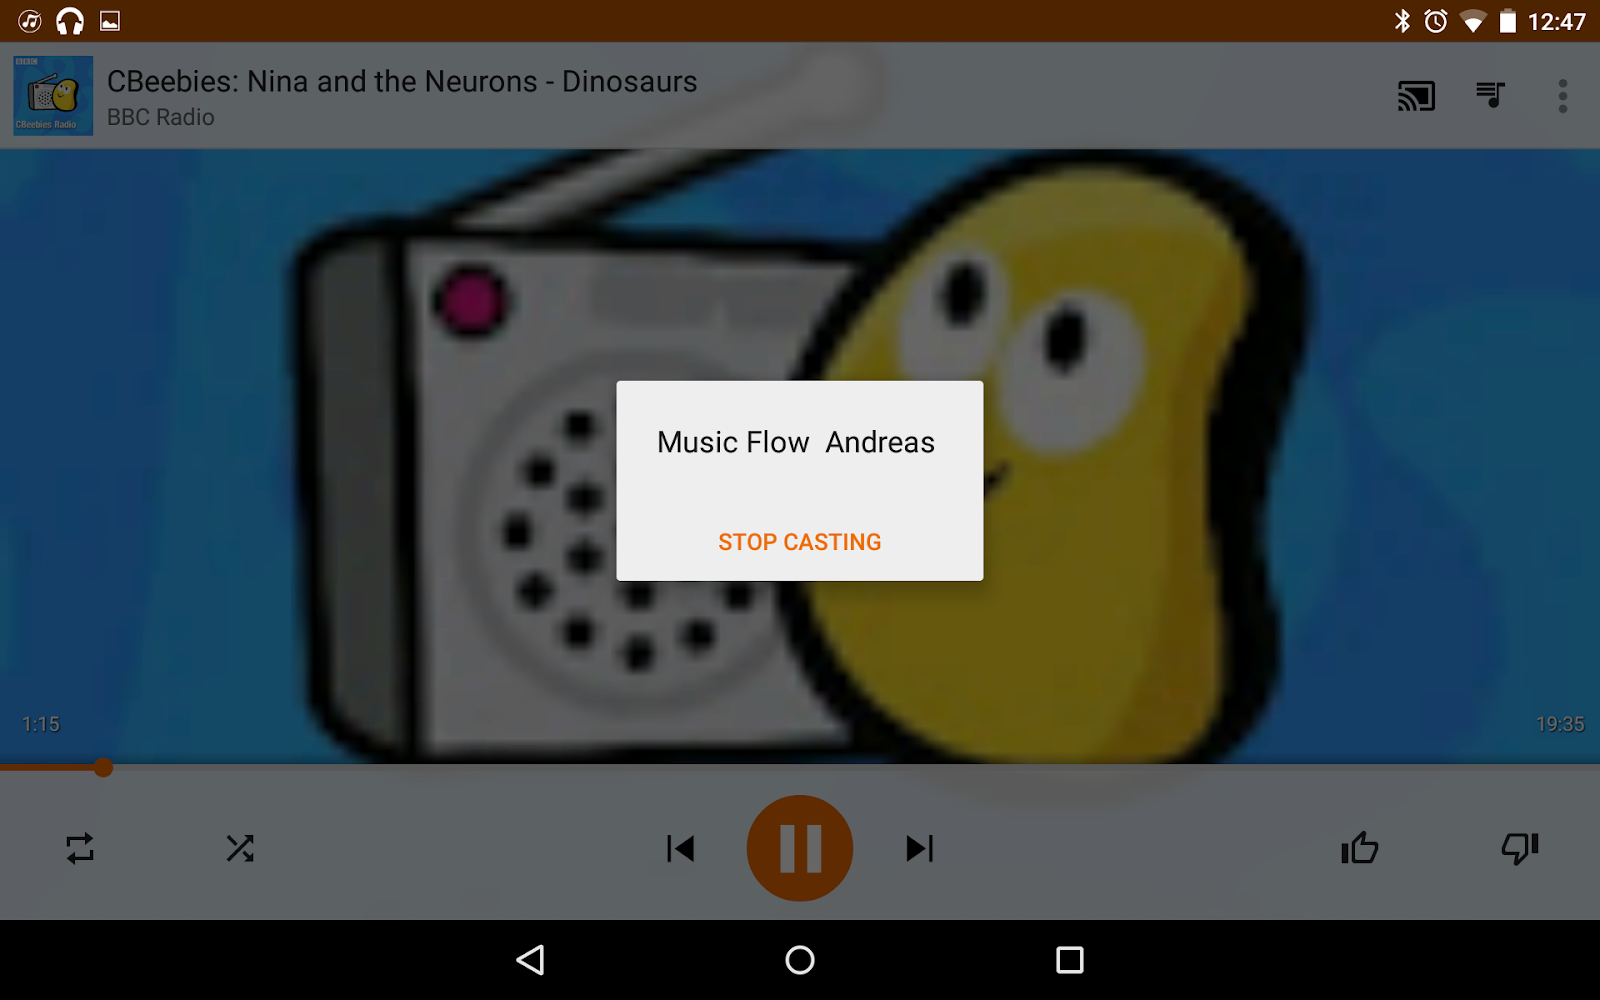
Google Cast for Audio has just launched and being a foreign language teacher, I’m very excited about its potential in the classroom. So I ordered the first set of affordable speakers (LG Music Flow H3 for €127) which I consider more than suitable for a classroom.

In brief, Google Cast Audio is the audio version of Chromecast and is supported by all apps and devices that support Chromecast (LG Flow Player, Google Play Music, Pocketcast, etc.). Of course you can play any local mp3 file wirelessly over wifi, but it get’s really interesting when you play from the Cloud.  

Screenshot_2015-04-28-12-47-05.png

The advantage of Google Cast Audio over other wireless ways of delivering audio (e.g. Bluetooth) are:
  • faster and easier to connect
  • very reliable due to more bandwidth
  • better quality audio
  • doesn’t require any resources on your mobile device as the audio is not streamed from the device but from the network

As you can upload all your music and audio files to Google Play Music, you don’t need much more than that for your needs (music, podcasts, foreign language files, etc.). If you don’t want to use Google Play Music, there is a variety of other services available to choose from (Deezer, etc.) When it comes to using podcasts you might want to use an app like Pocketcasts for streaming a podcast rather than downloading it.  

I also use Google Drive to store sound files. Of course you can also play audio files from Google Drive, but you have to download them first (best done before your class) and keep them on your device.

Chromebooks currently don’t seem to support Cast Audio (the chromecast extension couldn’t find the audio device). However, it is still possible to connect the H3 speaker via Bluetooth.

23.03.15

How to download subtitles or captions from YouTube

YouTube is probably the most used digital tool in classrooms all over the world today and lends itself for a variety of purposes ranging from short listening comprehension during classes to flipped classroom activities.
Often it would be useful to have the subtitles (captions) available for preparation or follow up activities, particularly in foreign language classes. Unfortunately there is no option to download subs from YouTube directly. There are, however various workarounds. The fastest way is also the geekest one and it works like this.
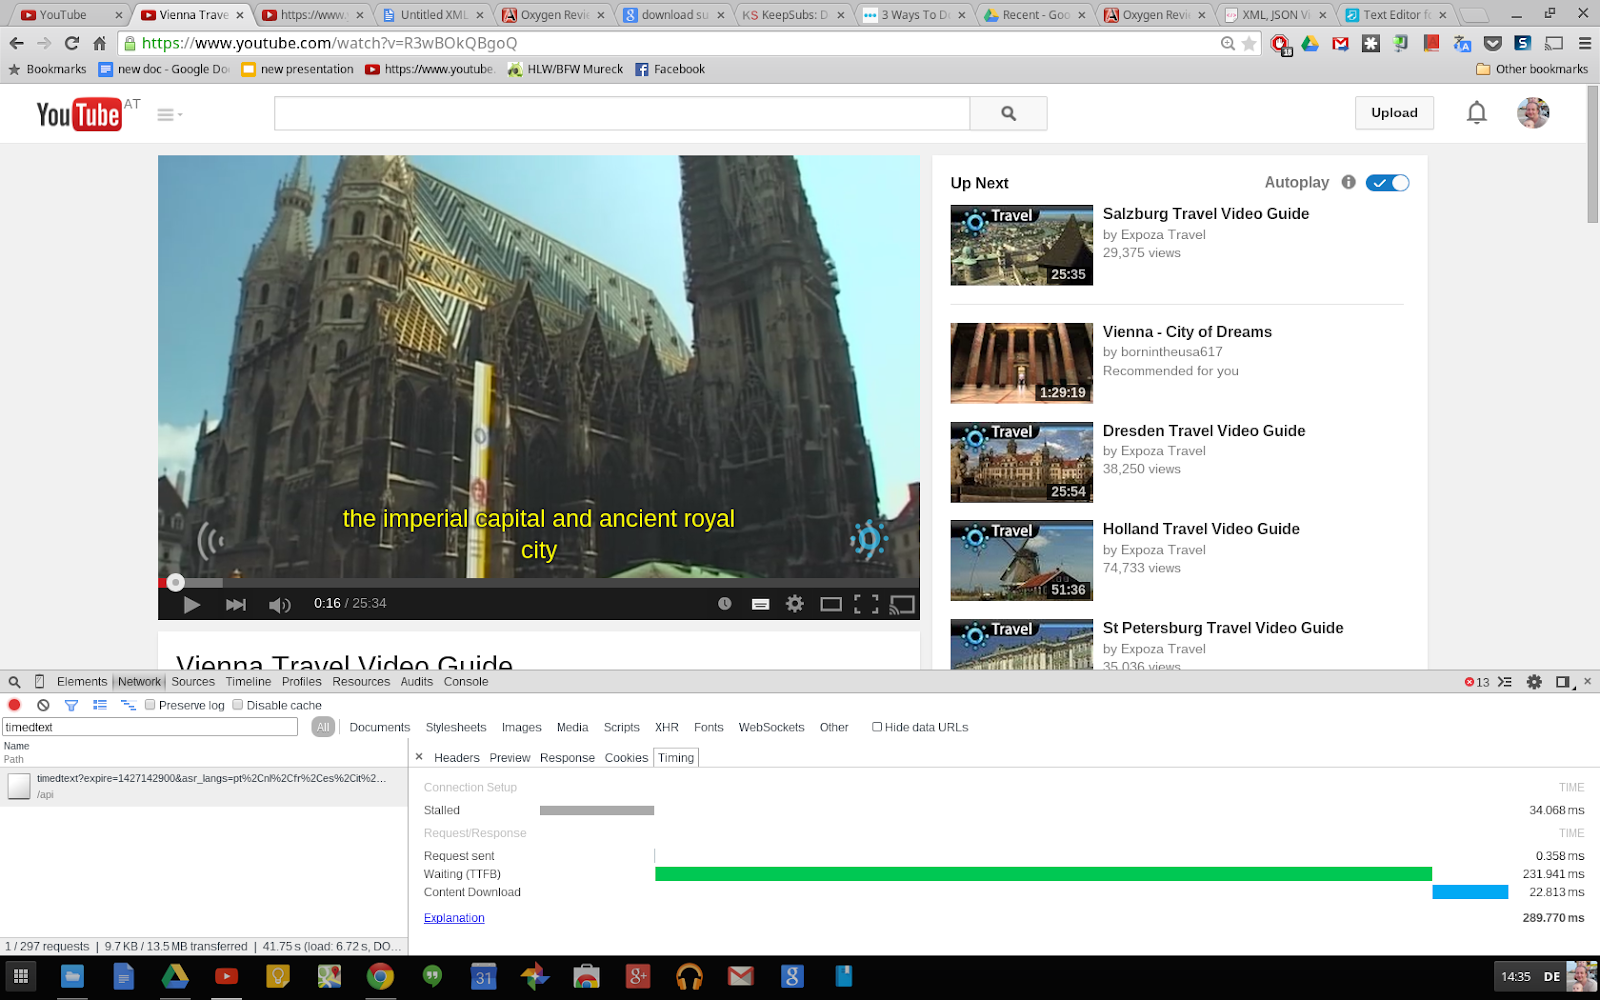
Screenshot 2015-03-23 at 14.35.48.png
  1. Open the video you want to extract the subtitles from in Google Chrome.
  2. Turn on the subtitles in the bottom right menu (often only auto-generated subtitles are available, which you might still want to download, even though the transcription is not perfect). Turn on developer tools and filter for “timedtext” and you get the URL link to the chosen subtitles file  in xml format (open by double clicking and a new broswer tab will open).
  3. To extract the text from the xml file I save it to my Drive (using the “save to Drive” Chrome extension).
  4. Finally I open the XML file with the oXygen XML Webapp (you have to connect it with xml files once using the “connect more apps” option when opening it). And voilà. That’s all you need to do.

Screenshot 2015-03-23 at 14.41.07.png
If you find that method too geeky, here is another one:
Use http://keepsubs.com/ to donwload an .srt file. Rename the file to .txt and then you can manually copy the text from the file - however it takes much more time than the first method which really only takes a few seconds once you get the hang of it. 

19.03.15

Using quick links in Chrome to existing and new Google Drive files

Google Drive is great for quickly finding your documents. The search function will find almost anything in a matter of seconds (even if hidden deep inside documents, pdf and image files) and you can star frequently used documents.


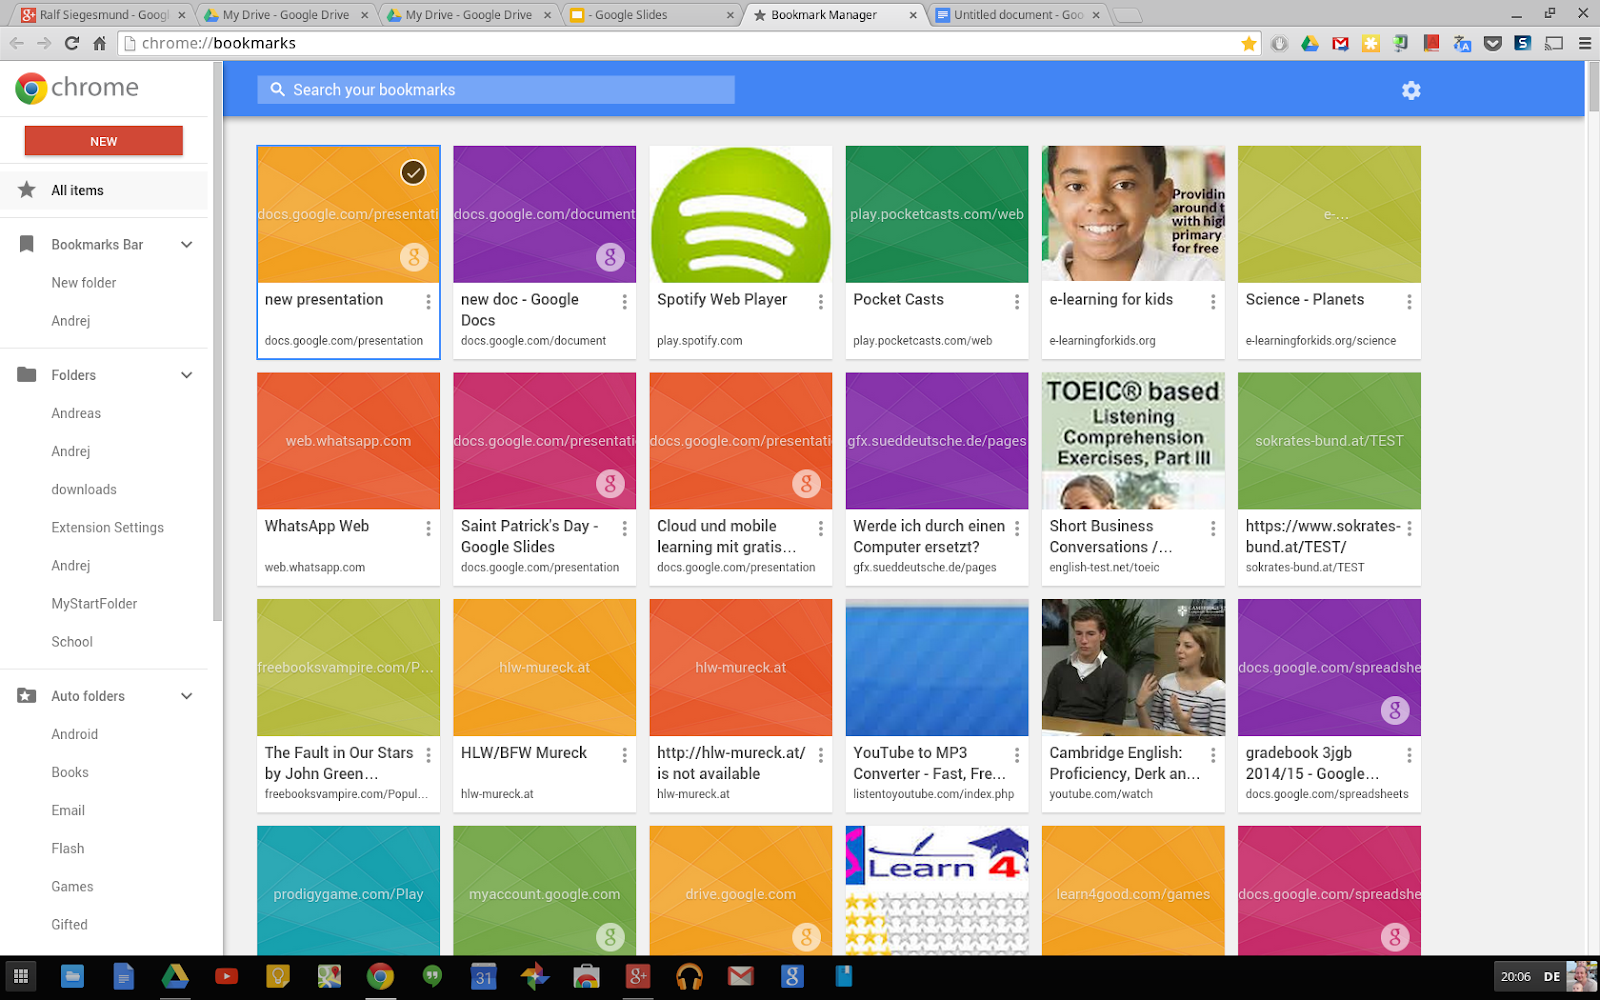
Screenshot 2015-03-19 at 20.06.13.png


However, there is even a faster way to your documents than staring them. By using Chrome bookmarks you can access your files without having to go into your Drive in the first place. I do this typically with files I use almost on a daily basis, like my lesson planner (a doc)  and my gradebooks (Google spreadsheets). All I need to do is star the document in the omnibox and then I can use autocomplete  to get to them quickly, e.g. “less..:” for lesson planner, or the grade for which I need the gradebook.  


You can even create new documents this way. However you will need to create the link manually in your bookmarks:
  1. Go  to chrome://bookmarks/
  2. create a new bookmark to
  3. https://docs.google.com/document/create
  4. name it “new doc” (or anything you will remember, like “create document”)
  5. and then you will be able to use the bookmark either from the omnibox, the bookmarks bar or the bookmarks page.


If you want to create shortcuts for a new slide or sheet, you only need to substitute the “document” part of the link with “presentation” and “spreadsheets” respectively.

24.02.15

Prezi for Android review

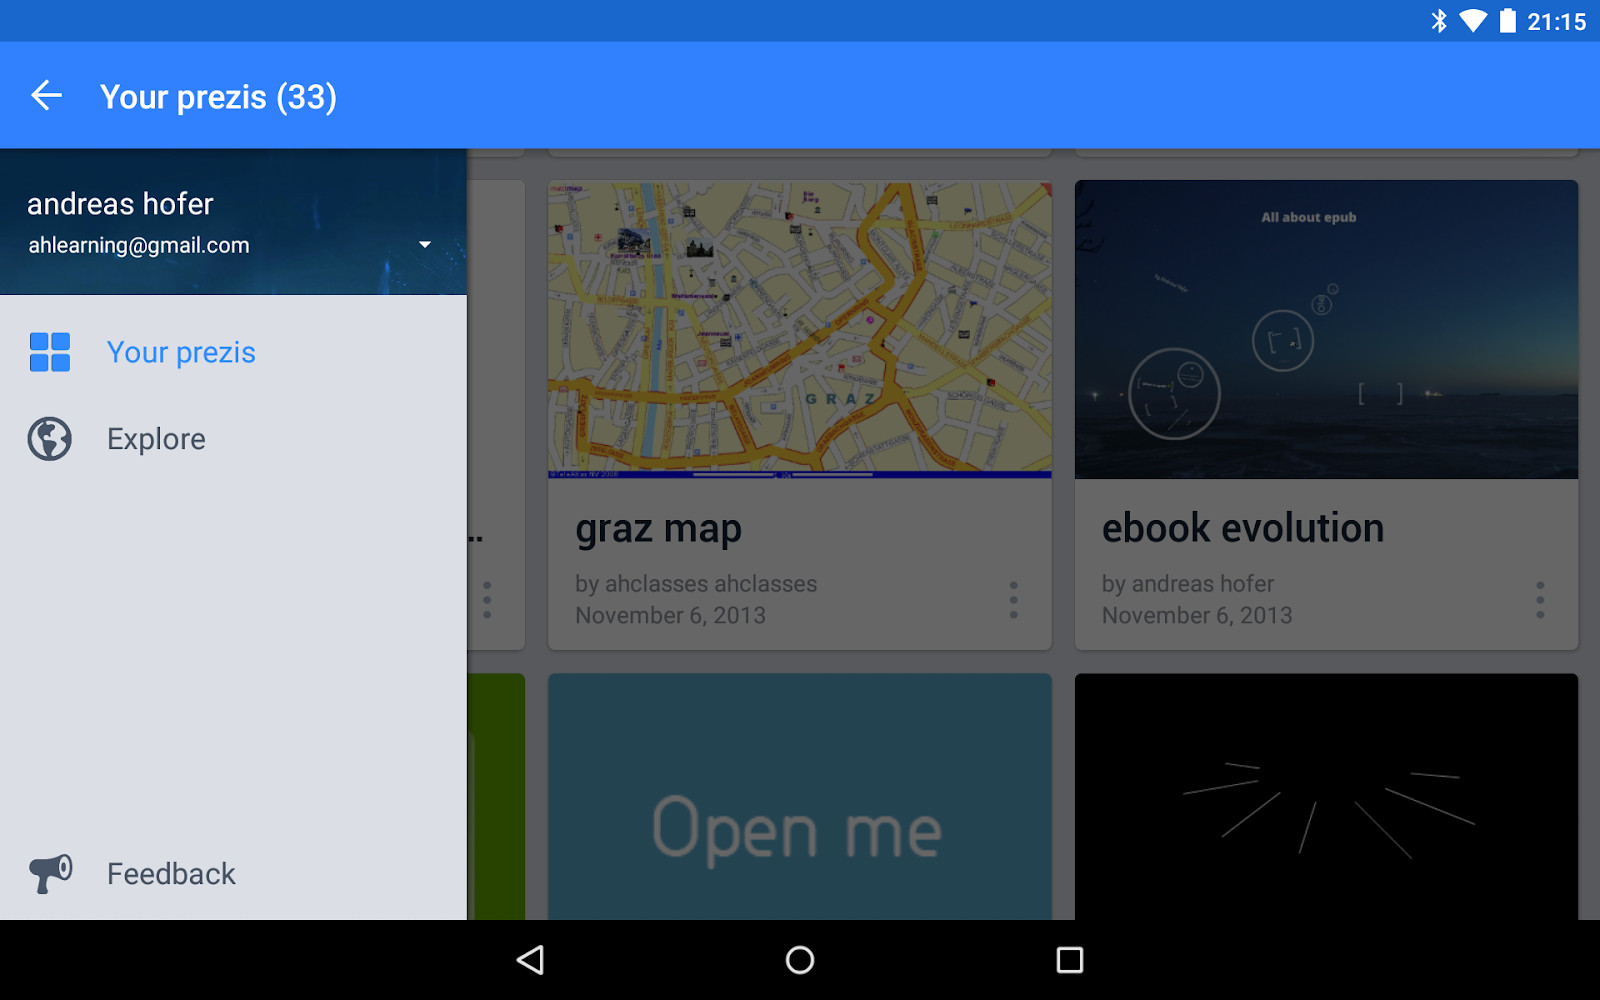
Another notorious latecomer has finally made it onto the Android platform: Prezi. The app itself is only partially useful as it is only a viewer and won’t allow you to edit, still you can use it to view presentations and to rehearse them on the go.


Screenshot_2015-02-24-21-15-51.png

It would be nice to have Chromecast support, so that you can the use the app for live presentations as well. In the description it says “Chromcast for supported devices”. This, however, is misleading. There is no native Chromecast support in Prezi yet. You can only use Chromcast mirroring if your device supports it (Kitkat and Lollipop so far).

Having said that, if you do have one of those supported devices, presenting with Prezi on Android is fun. Even so it takes some getting used to (double clicking instead of clicking for zoomin in, clicking/tapping instead of swiping for continuing the path).


The good:
  • Clean and beautiful material design
  • Fast
  • Great for presenting if you have a Nexus or brand new Android device

The bad:

  • no editing
  • misleading promise of Chromecast support

19.02.15

Creating narrated screencasts

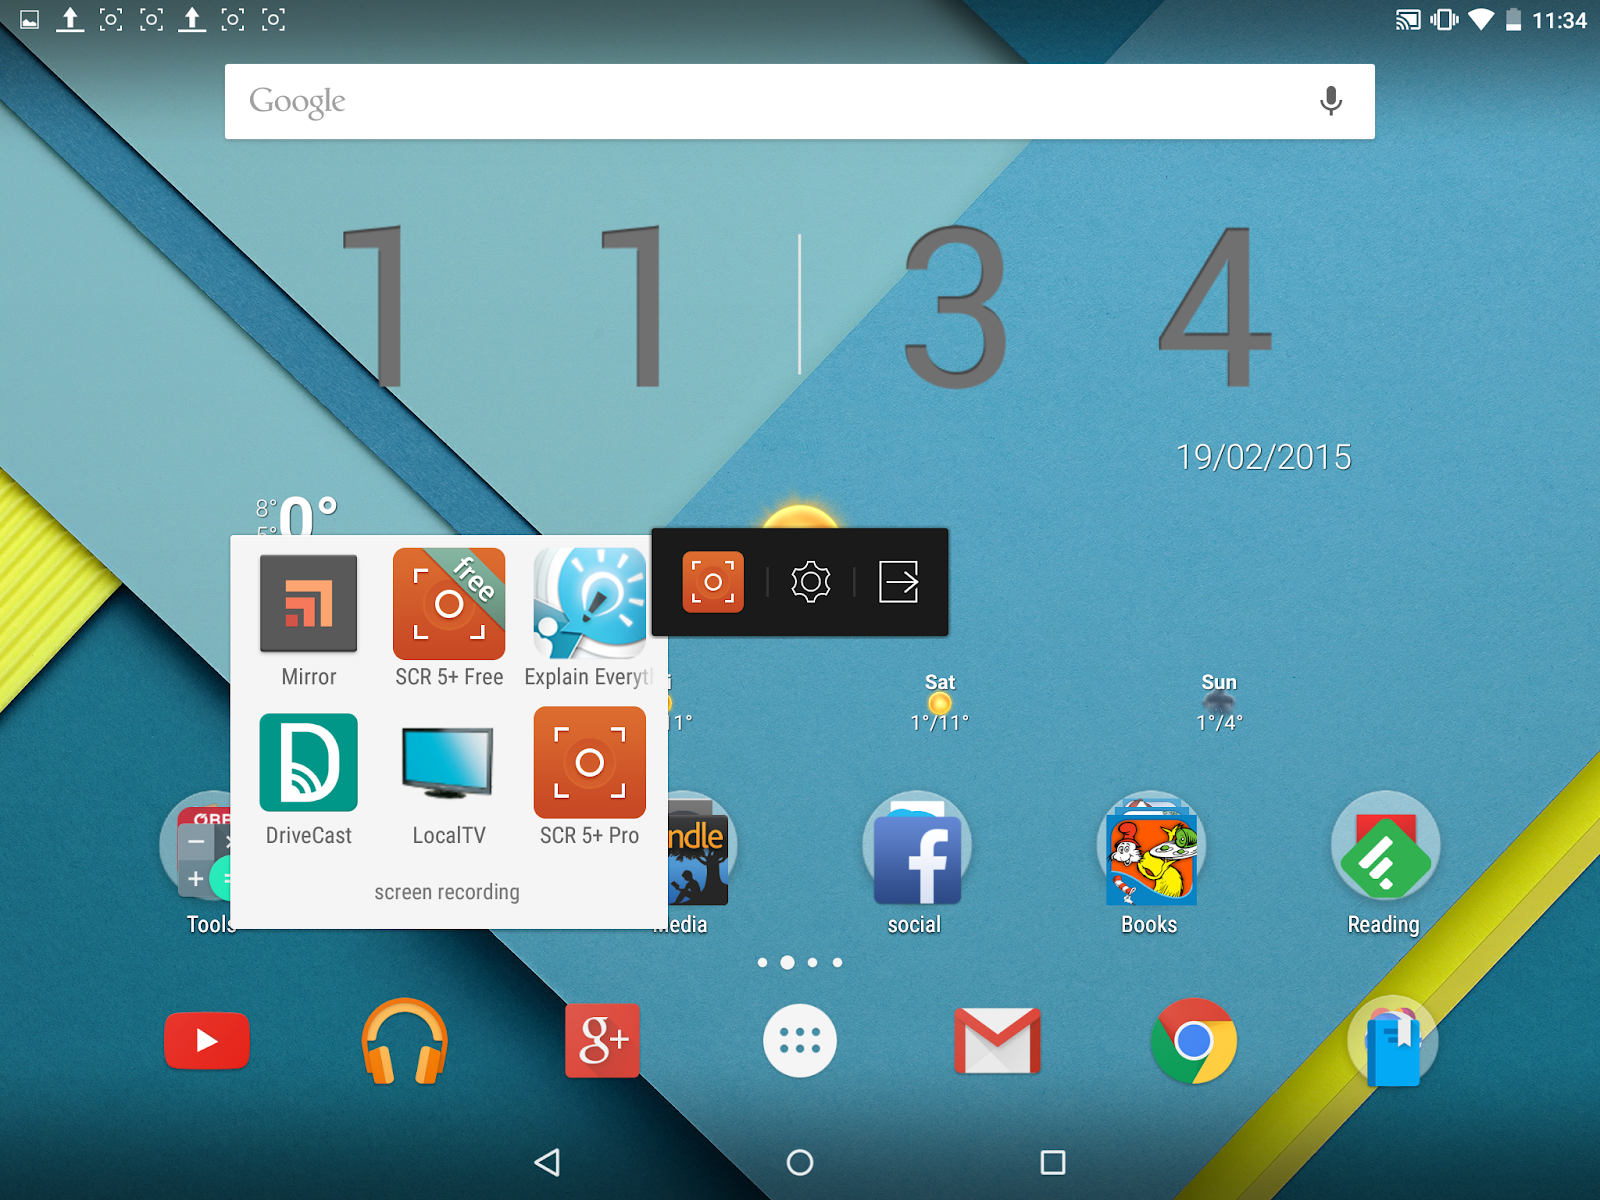
Screen recordings have been notoriously hard to do in Android. You had to tether your device to a PC or root it to do so.This, however, has changed since Android 5.0 Lollipop which supports screen recording natively and there is a number of great and easy to use apps to help you and your students create screencasts. The app that I use for recording is scr 5+ which come both in a free and a paid version.


Screenshot_2015-02-19-11-34-40.png


Screencast can be used for a number of purposes in education:

  • creating app demos (e.g. how to study vocab on Quizlet)
  • narrated presentations using Google Slides or Powerpoint
  • guided tours with Streetview or photospheres created by yourself
  • recording a whiteboard explaination
  • scribbling on a chart and explaining it and much more


Here are some tips on how to do screencasts:

Screencasts should be ideally short, somewhere between one to five minutes, as they get hard to listening to, particulary when not edited.

Some light editing can be done with the YouTube editor. Often all you need to do is trim the beginning and the ending of a video, which can be done easily with the YouTube editor. Other functions of you the YouTube editor you might want to use are increasing the audio volume and using free music in case you don’t want to do a voice narration.

Scripting a screencast before recording it might be a good idea, particularly if you want to avoid
slips. One of the avantages of creating a script is, that you can reuse it later for creating the captions. 

I use the YouTube editor also to add a podcast title sequence and closed captions. See also this previous post here.

Beliebte Posts